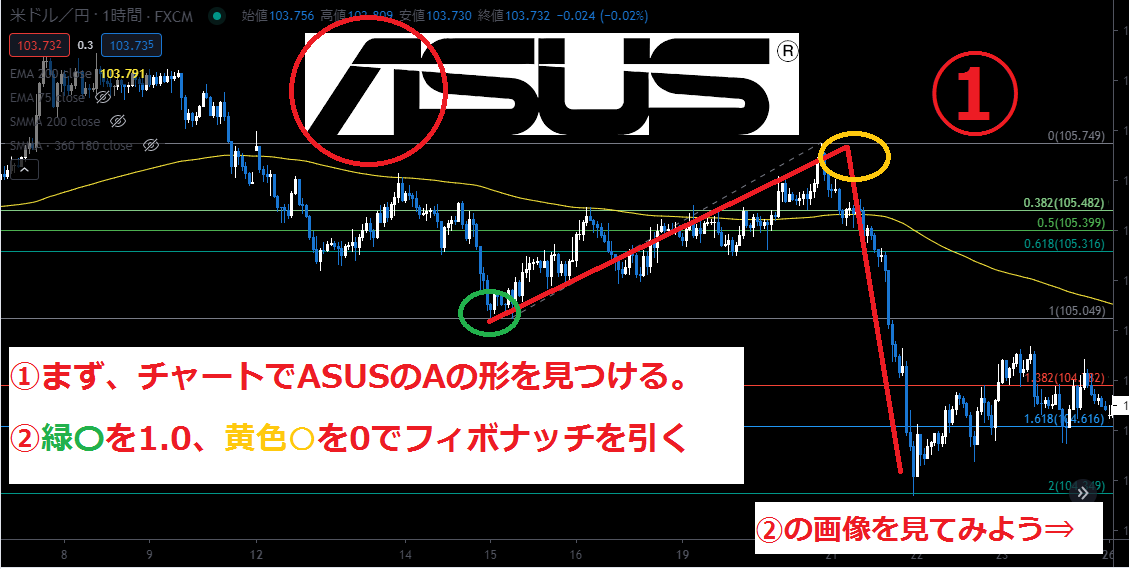
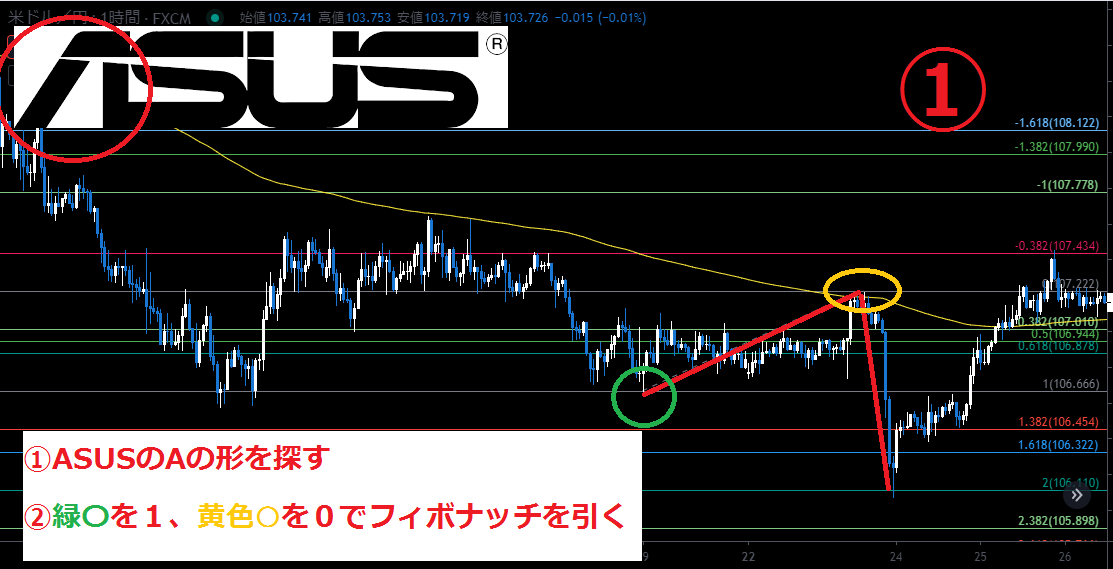
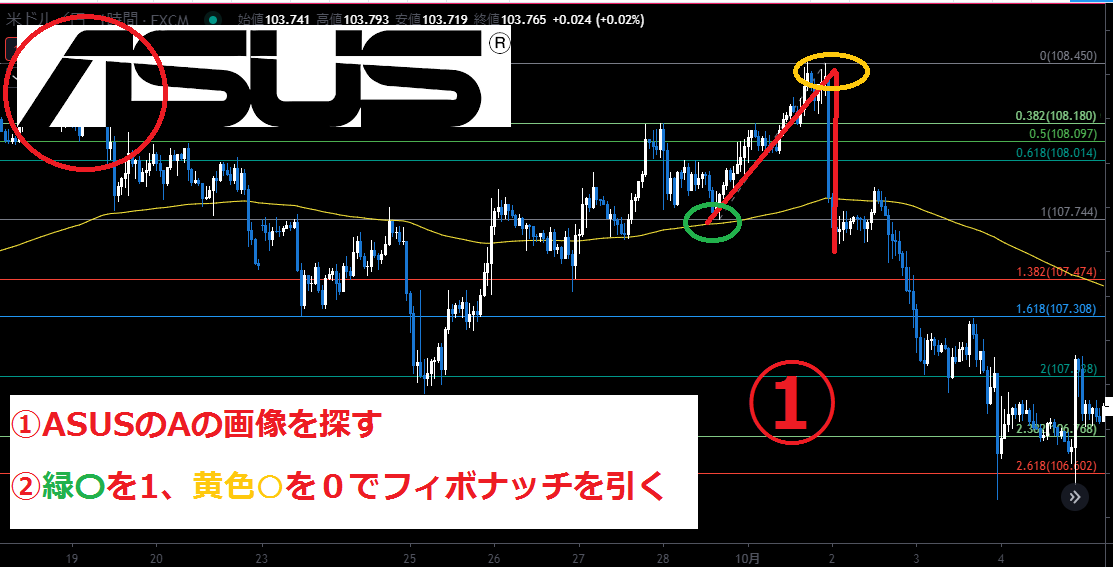
フィボナッチの引き方
①まず、ASUSのAの形を見つける
![](https://hikikomori-toushika.com/wp-content/uploads/2021/01/asus.png)
②起算点を100%、頂点を0%でフィボナッチを引く
終了!!!
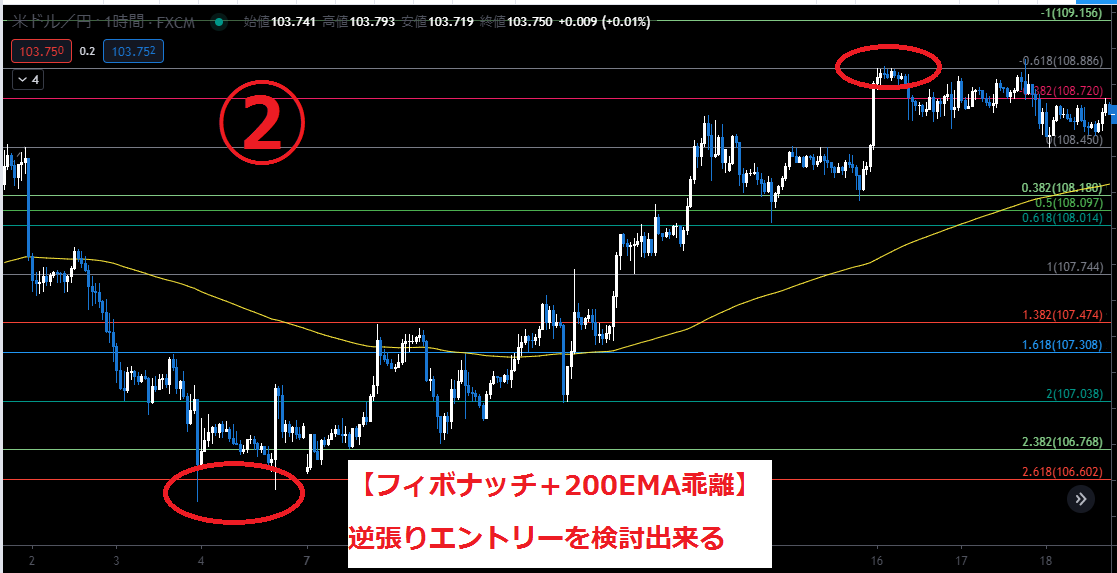
実際に①の条件に合致しているチャートを用意したので見ていこう!
1ケース目
![](https://hikikomori-toushika.com/wp-content/uploads/2021/01/1月20日.png)
![](https://hikikomori-toushika.com/wp-content/uploads/2021/01/1月20日②.png)
2ケース目
![](https://hikikomori-toushika.com/wp-content/uploads/2021/01/1月20日③.png)
![](https://hikikomori-toushika.com/wp-content/uploads/2021/01/1月20日④.png)
3ケース目
![](https://hikikomori-toushika.com/wp-content/uploads/2021/01/1月20日⑤.png)
![](https://hikikomori-toushika.com/wp-content/uploads/2021/01/1月20日⑥-1.png)
4ケース目
![](https://hikikomori-toushika.com/wp-content/uploads/2021/01/1月20日⑦-1.png)
![](https://hikikomori-toushika.com/wp-content/uploads/2021/01/1月20日⑧-1.png)
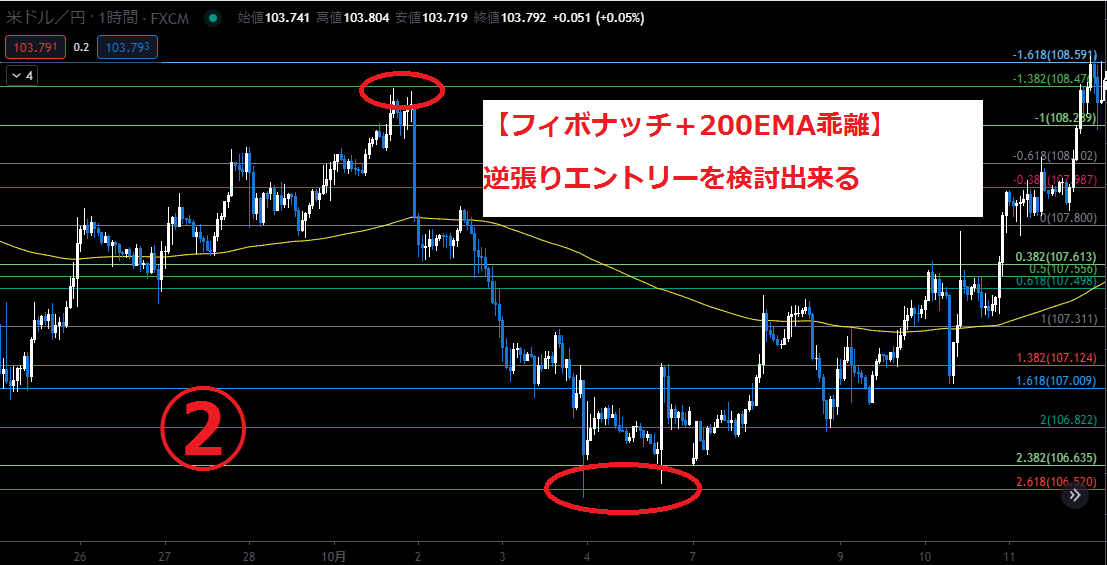
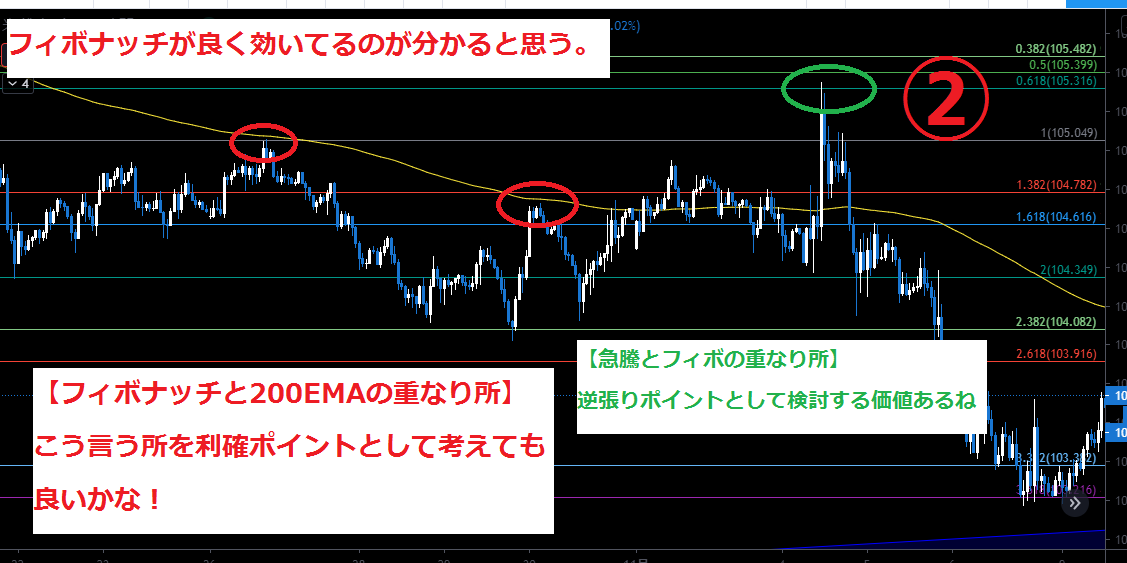
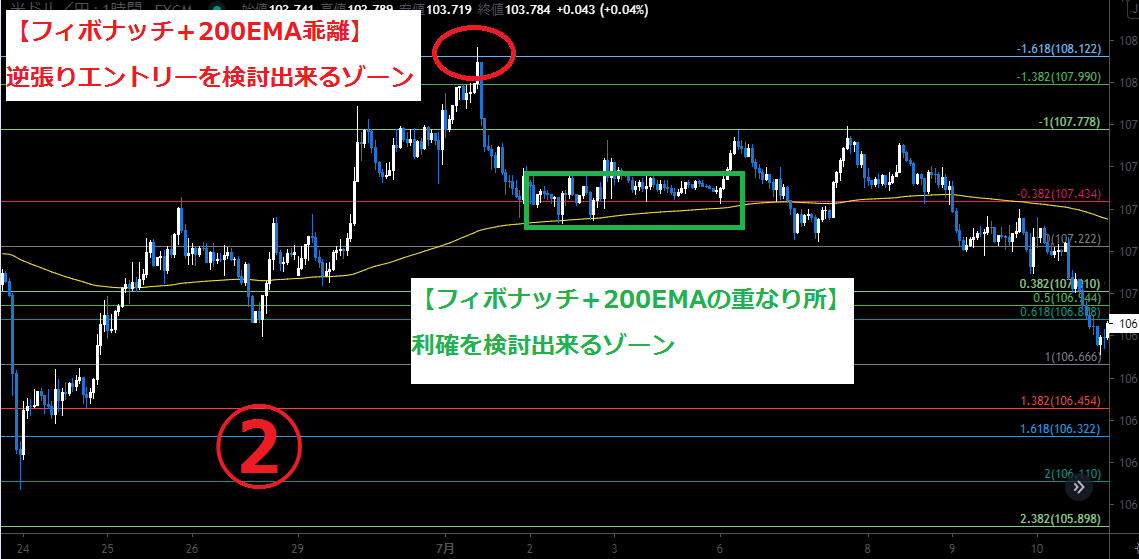
フィボナッチが良く効いてるのが分かると思う。ただ、大事なのは、フィボナッチにタッチしたからエントリーをするのではなく、必ず他のエントリー要素を含める事が大事だよ!※好きなパターンを参照
そして、200EMAとフィボナッチにアラートを設定しておけば、無問題!トレーディングビューで大活用してる5つの事を参照
このフィボナッチの引き方は、結構使えるので是非、参考にして頂ければと思う。